I recently needed an upgrade from my 4 year old, 6 pound Lenovo IdeaPad Z580 laptop that doesn’t last close to an hour on battery life anymore, so I went shopping around to find a lighter weight upgrade.
After seeing a bunch of good customer reviews, video reviews and seeing it had decent Linux support, I landed on choosing the Dell XPS 13 i5 Skylake ultrabook as the replacement.
Some things I didn’t need in the replacement criteria were the touch screen. It’s just a personal preference that I don’t want on a laptop and didn’t want to sacrifice battery life for something I don’t use, along with being a lot cheaper.
What surprised me, was that the 256 GB SSD option was priced at $615+ more than the 128 GB SSD option. I already knew I was going to swap out the M.2 SSD as soon as it came for a 500 GB SSD priced at $180, so that saved quite a bit of money buying it separately.
- Items Purchased
- Windows / Updates
- Opening it up to upgrade SSD & Wifi chip
- Ubuntu 16.04 Install
- Compatibility & Support issues
- Dell USB-C Adapter
1. Purchased Items:
- Dell XPS 9350-1340SLV 13.3 Inch Laptop (Intel Core i5-6200u, 8 GB RAM, 128 GB SSD)
- Link: http://amzn.com/B016FKG020
- Price: $790
- (Price watch at camelcamelcamel)
- (Price watch at camelcamelcamel)
- Samsung 850 EVO 500 GB M.2 3.5-Inch SSD (MZ-N5E500BW)
- Link: http://amzn.com/B00TGIW1XG
- Price: $180
- Intel 2nd Gen Dual Band Wireless Adapter (7265.NGWG.W.Intel / IEEE 802.11ac Bluetooth 4.0)
- Link: http://amzn.com/B00RCZ4I6S
- Price: $18
- Dell Adapter, USB Type C to HDMI/VGA/Ethernet/USB (DA200)
- Link: http://amzn.com/B012DT6KW2
- Price: $70
When it first came in the mail, I was really trying and willing to give Windows 10 Home a shot as I hadn’t used it in while since Windows 7 and it’s their latest *newest* offering. This soon changed on running into issue after issues, trying to get the operating system updated to have the latest Windows updates and security patches.
By default it booted Windows up fine, so I did what everyone mentioned to do and installed the latest BIOS drivers. The version it came with was v. 1.0.0 installed. So that was updated to Dell XPS 13 9350 System BIOS v. 1.3.3 located at:
The Bios update went pretty smoothly. I then installed their 4 Urgent other upgrades to get it up to speed with Windows 10 too.
- Intel HD Graphics Driver
- 9350_Video_Driver_9NXMH_WN32_20.19.15.4390_A04.EXE
- Intel(R) Thunderbolt(TM) 3 Firmware Update
- Intel_TBT3_FW_UPDATE_NVM16_A03_02.12.07.exe
- Intel(R) Thunderbolt(TM) 3 Firmware Update
- Intel_TBT3_FW_UPDATE_NVM16_A03_02.12.07.exe
- Intel Thunderbolt Controller Driver
- 9350_Chipset_Driver_2V6DD_WN32_15.3.39.250_A01.EXE
These also installed just fine & didn’t have many issues, just a few reboots needed for each one. This is when it came time to update Windows itself.
2. Windows / Updates
I naturally thought it would be as simple as going to the Windows Update settings screen & letting it do its’ work. I was met with a problem error screen and a [Retry] button which didn’t do anything.
Windows Update
There were some problems installing updates, but we’ll try again later. If you keep seeing this and want to search the web or contact support for information, this may help: (0x80240fff)
[Retry]
No amount of reboots or clicks on the Retry button solved any issues. Doing a bit of Googling for the “0x80240fff” error and support forums later, some of the things attempted to fix were:
- Stopping the BITS, Cryptographic, MSI Installer and the Windows Update Services via cmd prompt as admin user.
- Using the Windows Update Automated Troubleshooter. Each time in ‘Find and Fix problems’ it said it found issues & they were fixed, but still no updates installed.
- Booting up in safemode w/ networking enabled, doing the same as above. (Although it didn’t see any of the wireless networks or didn’t seem to recognize the Broadcom wifi card, so it didn’t have an internet connection)
- Tried a clean Windows 10 install from the recovery boot mode, to do a clean install. Thinking it may have been some option I selected in install.
But still nothing. After many hours of debugging later, I attempted to download their Media Creation tool in https://www.microsoft.com/en-us/software-download/windows10/ (Even though it was already Windows 10) . It seems to have kickstarted the Updates, but it soon installed a clean Windows 10 install with none of the Broadcom wifi chips drivers.
On reboot of the re-install, I was also met with the new blue screen that it couldn’t boot. Specifically, showing:
Your PC ran into a problem and needs to restart. We’ll restart for you.
If you’d like to know more you can search online later for this error: SYSTEM_THREAD_EXCEPTION_NOT_HANDLED
I know the correct way is to always get the Windows ISO from Microsoft themselves, and not deal with the bloatware that may come pre-installed. But at this point, with no internet and the laptop not having an Ethernet cable to hardwire it in, I gave up.
Knowing I wasn’t going to be using the SSD in it with Windows anyways, I began switching it to a Linux computer (yay!).
3. Opening it up to upgrade SSD & Wifi chip
It was relativity easy to open it up with the help of a T5 screen driver & a Phillips #0 screwdriver for the 1 screw under the spring-loaded flap that shows the laptop model details.
Some youtube videos of other people doing and this ifixit page later:
- https://www.ifixit.com/Teardown/Dell+XPS+13+Teardown/36157
- https://www.youtube.com/watch?v=vN5ODuCFEaY

(Image with the previous ssd unscrewed and the new SSD & Intel wifi chip on the right)
I was soon upgraded to a new clean 500 gigabytes M.2 SSD and the better supported Intel Wifi chip. On all previous laptops and desktop, I’ve had bad experiences with anything Broadcom chips and Ubuntu support related. So I avoid it as much as possible, to save precious debug time of having to find and download custom github repos and also compiling the libraries. Only to have to redo compiling them on every core Ubuntu update.
Note: The RAM is soldered onto the motherboard, so there’s no manually upgrading that. Which is why I chose the 8 GB RAM option, as it will stay on there for the life of the laptop.
4. Ubuntu 16.04 Install
After inserting the bootable flash drive with the latest Ubuntu Desktop Xenial Xerus version. I booted up and went through the regular Ubuntu installer to get it installed without any issues.
I was met with the Dell Support Assist Bios screen after the first boot with new hardware, but it didn’t have any issues recognizing the new SSD or anything else.
After the Ubuntu install, the Wifi card worked right out of the box and didn’t run into any compatibility issues. The mouse trackpad, screen, brightness shortcut, volume mute/up/down key worked too. (Although it doesn’t seem like the media shortcut: previous, play/pause & next keys do).
I just needed to fix the display resolution, as text was tiny while first logged in.
# Linux kernel details
$ uname -r
4.4.0-22-generic
For my install, I also have the encrypted LUKS filesystem along with the Encrypted Home folder for users. I’ve yet to have data loss issues on it and it looks to also be fully supported & compatible, so far.
By fault of my own: There’s been a time where I’ve accidentally cleared the fat32 /boot/efi partition on my previous LUKS disk mounted laptop. This was due to trying to mount a 2nd SSD and then installing a different Ubuntu version on it (thinking it wouldn’t touch the 1st primary SSD boot record that was already there, it did, lesson learnt). Don’t quite remember the details of how I recovered. But after much debug time, I was able to find out the issue with the Boot-Repair utility, along with the Ubuntu live bootable USB to recover/backup my home files and do a clean install again.
5. Compatibility & Support issues
It’s only been a few days, but the only issue ran into was when restarting from hibernation the machine reboots.
To fix: I logged into BIOS by pressing F12 to change RAID to AHCI mode in the settings, and that fixed the reboots.
No networks issues:
This was quickly fixed by running this script & creating a bash file on my desktop whenever I saw it occurred:
# See details
iwconfig

# Add wifi card
# Change out wlp58s0 for the network device turned off
sudo ifconfig wlp58s0 up

# Restart network-manager
sudo service network-manager restart

# See details after restart
iwconfig
This then got the Wifi networking working again without needing to reboot within the current logged in user session.
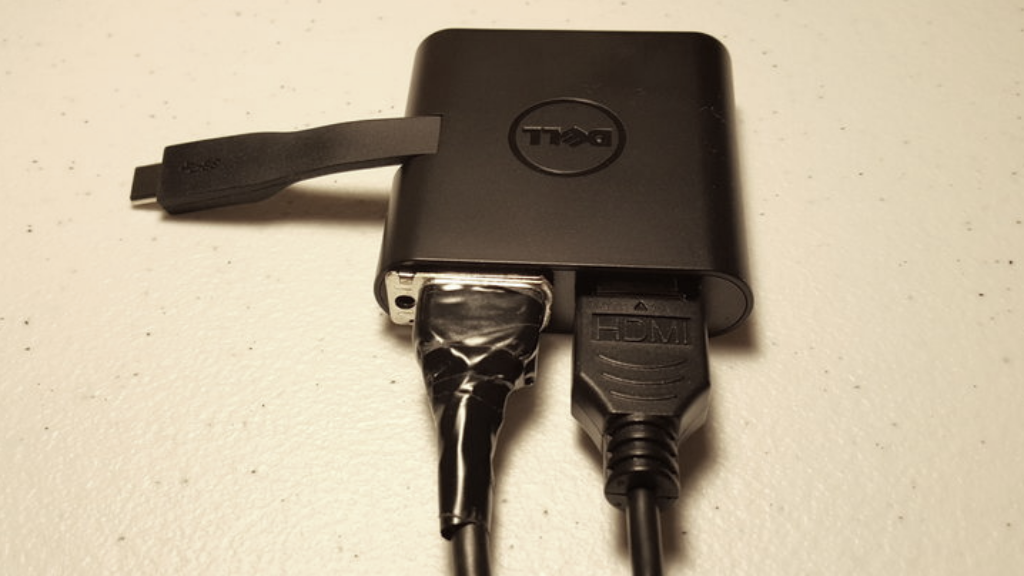
5. Dell USB-C Adapter
I may have to touch up on the Dell USB-C to HDMI/VGA/Ethernet/USB Adapter in a follow-up post later. So far out of the box, it has only supported the HDMI & VGA to external monitors. Not both at the same time for a 3 screen multi-monitor setup though.
By design it doesn’t seem like the HDMI and VGA cables fit at the same time, so I hacked up an extra VGA cable by using pliers to remove the blue casing with screws that lock it into cases and cutting the metal hole on the right side to both fit, but no luck getting both to work simultaneously.
 I asked at the Microsoft store about this exact dual-screen situation with the adapter and they mentioned it would work, but no luck! (Haven’t tried it on Windows, sorry)
When the HDMI was first plugged in, it was recognized in the All Settings >> Displays setting screen automatically, but it didn’t work due to the resolution it was sending the external screen was to high. As soon as that was lowered via the drop down list, the deskop displayed fine on both screens. My theory is something HiDPI related causes
The xrandr command will show that both screens are detected.
# HDMI only plugged into adapter
$ xrandr
Screen 0: minimum 8 x 8, current 2808 x 1099, maximum 32767 x 32767
eDP1 connected primary 1368x768+1440+331 (normal left inverted right x axis y axis) 294mm x 165mm
   1920x1080     59.93 +  59.93
   1680x1050     59.95    59.88
   1600x1024     60.17
   1400x1050     59.98
   1600x900      60.00
   1280x1024     60.02
   1440x900      59.89
   1280x960      60.00
   1368x768      60.00*
   1360x768      59.80    59.96
...

DP1 connected 1440x900+0+0 (normal left inverted right x axis y axis) 598mm x 336mm
   1920x1080     60.00 +  50.00    59.94
   1920x1080i    60.00    50.00    59.94
   1680x1050     59.88
   1280x1024     75.02    60.02
   1440x900      59.90*
...

DP2 disconnected (normal left inverted right x axis y axis)
HDMI1 disconnected (normal left inverted right x axis y axis)
HDMI2 disconnected (normal left inverted right x axis y axis)
VIRTUAL1 disconnected (normal left inverted right x axis y axis)
The screen ratio was off, as it needs 1920×1080 (16:9) option selected. But when that happens it thinks it has no signal, so I needed to play with it a little to get it working. With the help of http://askubuntu.com/a/19956
For USB/Ethernet in both attempts, I haven’t been able to get the external USB to recognize a flash drive or the Logitech mouse usb dongle. I also attempted to plug in an Ethernet hardline on the other side, to test getting internet but it also doesn’t seem to recognize it, even though the green light on the adapter does light up.
We will have to re-visit making USB/Ethernet compatible, some missing updates or find an alternative but I could live with only HDMI working for now. Let me know if you have some better alternatives!
Great first post Oscar.
When I was in the market for a new machine, I was shopping entirely based on specs. I ended up going with the XPS 15, which isn’t too different from your XPS 13. Mine came with the touch screen & while it works great with gMaps & Stellarium, usually I keep it turned off.
I’m kind of surprised to hear of your Windows problems during install. I figured you were just going to put Linux on it and just forget about Windows. Mine came loaded with Windows 8. Immediately installed Win7 and it was off to the races. Got my drivers installed (there was only one I couldn’t find – I think it was the Intel Chipset driver). Anyway, aside from some minor maintenance of moving parts (both CPU fans & battery replaced), it’s been rock solid for almost 3 years now, and it will only blue screen when I am stupidly pushing an already memory-starved system. If they had a 32gb option at the time, I would’ve gone for it, though I can certainly work with 16gb just fine.
Since you’ve been fiddling with it for a few days, how’s your multi-monitor setup coming along?
Nice post,
I still have the display problem with usb-c adapter, what did you do exactly with xrandr ?
Hey Max,
I ended up not spending further time configuring it, since I couldn’t exactly get it to work. So I fell-back to using VGA for a secondary display, which appears to have worked out of the box.
Hey man! Great post but I really wanted to just drop a comment on your blog. Your blog has a super cool design. Is this wordpress by chance?
It is WordPress, just the default twentyseventeen theme with customizations for homepage & post page tweaks.